
OPEXSTUDIO
← All examples
Manufacturing / 6S / worked example

Make the welding bay ready to work

Make preparation, return and shift handover easier to follow.

Take the full example with youPhotos. People. A practical plan.

Project timeline, actions for every S and checks before completion.

Open sample PDF Free to read. No sign-in needed.
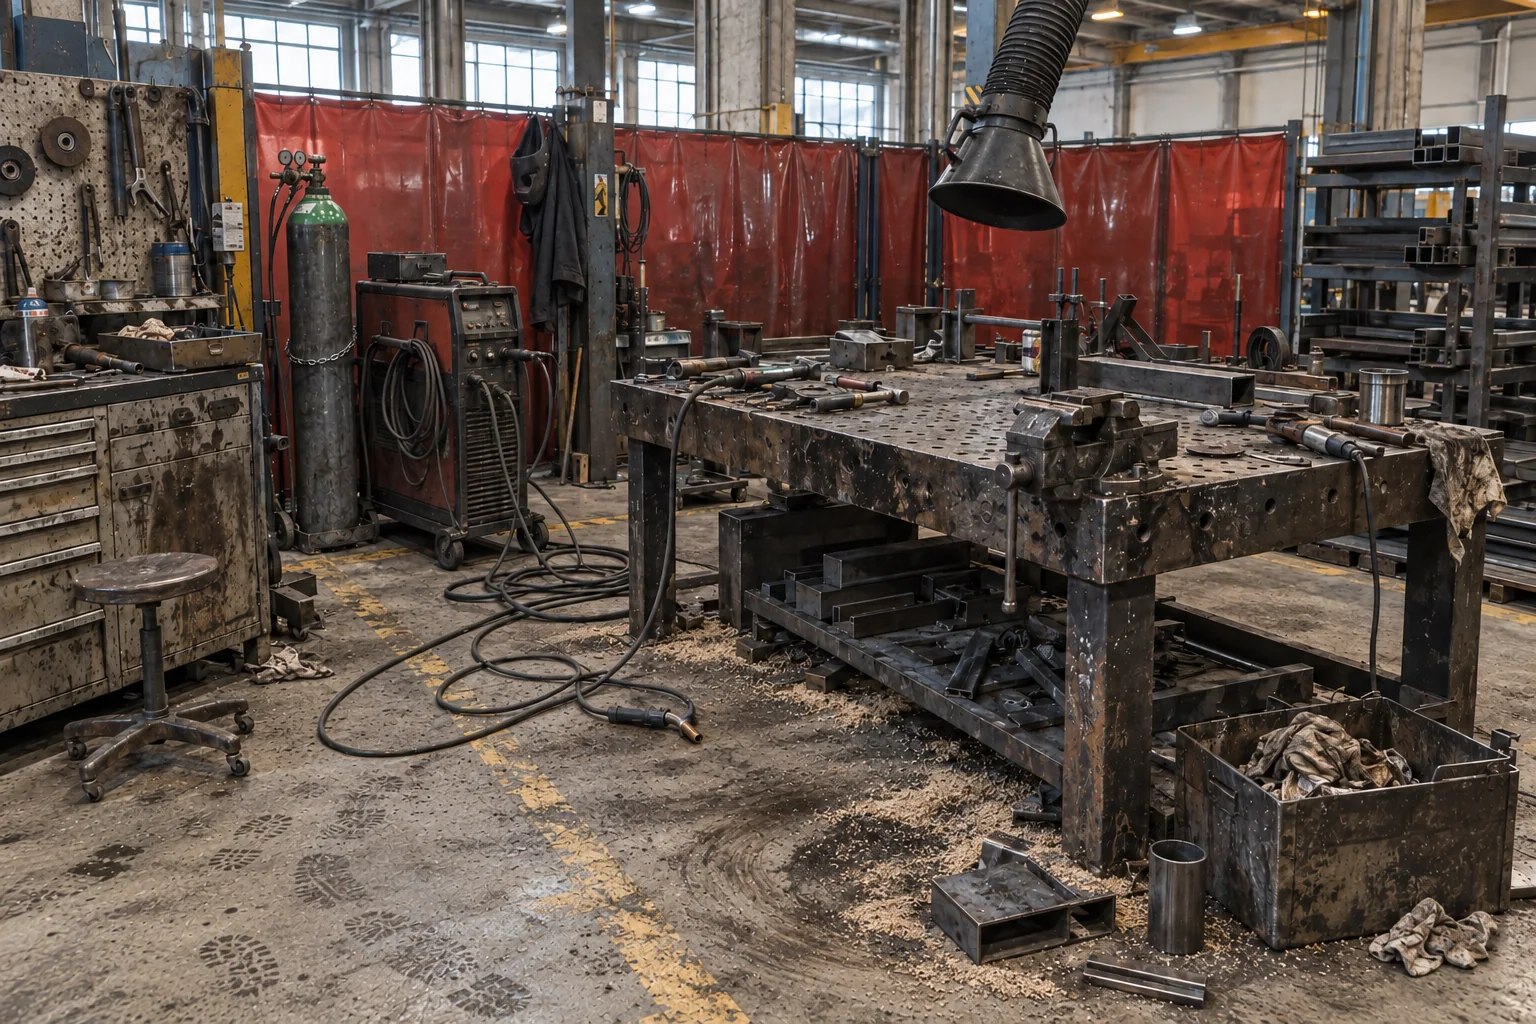
Generated illustration: Make the welding bay ready to work, starting condition
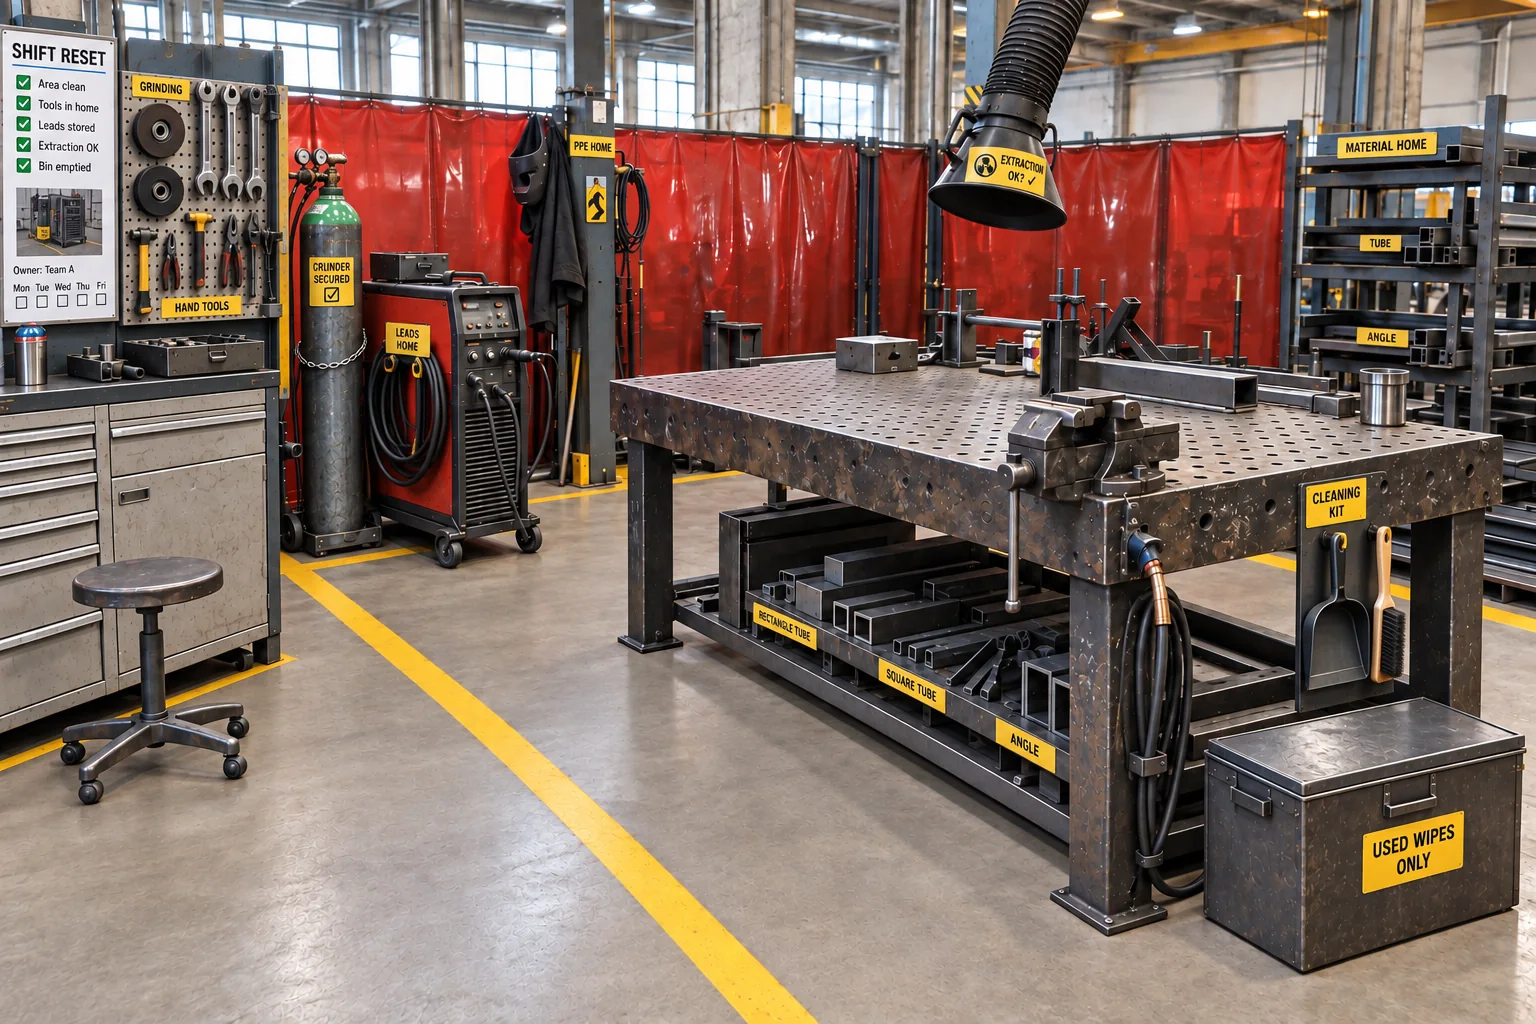
Generated concept: a possible improved arrangement for Make the welding bay ready to work
Starting pointProposed concept
Generated illustrations. The concept shows a possibility, not a completed improvement or verified safety result.

A-grade is the proposed target. A begins at 90% in the existing OPEX rubric. This target uses the same observed criteria and coverage as the sample baseline. It is proposed, not earned from the generated concept; Sustain and other unknowns remain unscored.

Learn it, then try it

Understand the method
behind this example.

Two illustrated lessons with practical steps, a question to try and feedback. Read online or follow the teaching pages in the full report.

A clear starting point

Make the problem
small enough to work on.

Oily bench edges, mixed fixtures and trailing leads slow preparation and hide the intended condition. Trial one bay with the weld team before expanding the arrangement.

The visible fit-up bay, fixture storage and local material return. Welding procedures, fume assessment, hot-work controls and machine suitability remain with authorized local owners.

Sample baseline27.8%Sample condition score
Proposed goal90.3%A-grade target

Illustrative starting figures. The goal has not been achieved.

Manufacturing / 6SOPEX field notes

Make the welding bay ready to work

Make preparation, return and shift handover easier to follow.

Sample starting point27.8%Sample condition score
Goal to work towards90.3%A-grade target
01

See the starting point

02

Picture a better arrangement

03

Test one area

04

Check and repeat

See the starting pointPicture a better arrangementTest one areaCheck and repeat

A worked example to learn from. Sample figures and people; targets are not achieved results.
People, timing and a clear finish

A plan the team can follow.

Read the full report ↗

Project completion timeline

Planned finish · Day 30
  1. Agree the bay boundaryJada · Fabrication lead

    Day 1–7 · Confirm material identity, fixture status and local work-control requirements.

  2. Restore clear positionsTom · Maintenance lead

    Day 8–14 · Tom records the residue-source investigation, authorized correction and real recurrence check; verify the storage arrangement too.

  3. Practice the handoverAmira · Welding lead

    Day 15–21 · Each shift demonstrates the correct consumable and fixture selection.

  4. Verify the preparationBen · Quality lead

    Day 22–30 · Repeat twelve comparable preparation samples and review local control evidence.

Proposed timing and fictional owners. Close each action after its check is met; a date alone does not prove completion.

Actions for each S

Planned finish · Day 30
  1. SortSeparate usable materialsJada · Fabrication lead

    Identify reusable stock, offcuts, damaged leads and unneeded fixtures with the fabrication lead.

    Day 1–7 · Each item has an approved use or disposition; uncertain equipment remains out of service pending review.

  2. Set in orderClarify fixtures and leadsTom · Maintenance lead

    Trial defined positions for fixtures, tools and stored leads while preserving screens, extraction and cylinder restraints.

    Day 8–10 · The next setup retrieves the required fixtures and the bay access remains clear.

  3. ShineRemove grime and find recurrenceTom · Maintenance lead

    Maintenance investigates repeated grease, oil and debris sources and verifies the approved corrective response.

    Day 8–14 · The cause is addressed and the next operating cycles are checked; cosmetic cleaning alone cannot close it.

  4. StandardizeAgree the bay handoverAmira · Welding lead

    Publish the accepted fixture locations, lead storage and reset check with the welding lead.

    Day 15–17 · The receiving shift demonstrates the handover and reports missing equipment or recurring concerns.

  5. SustainReview repeated setupsBen · Quality lead

    Track fixture-ready time, missed handovers and unresolved conditions through the month.

    Day 18–30 · Comparable setup observations and action closure evidence support the day 30 decision.

  6. SafetyCheck welding work controlsAmira · Welding lead

    The competent welding lead checks approved hot-work arrangements, extraction, screens and cylinder restraint before the layout trial.

    Day 1–30 · Existing work authorization and equipment controls are confirmed; the illustration proves none of these.

Proposed timing and fictional owners. Close each action after its check is met; a date alone does not prove completion.

Bring the idea back to your work

Start the conversation with your team.

Use the report to choose one area, name the next action and agree how you will check it. Try a photo from your own workplace, then turn the possibility into a practical plan.

Keep exploring

Another useful starting point.

See every example →